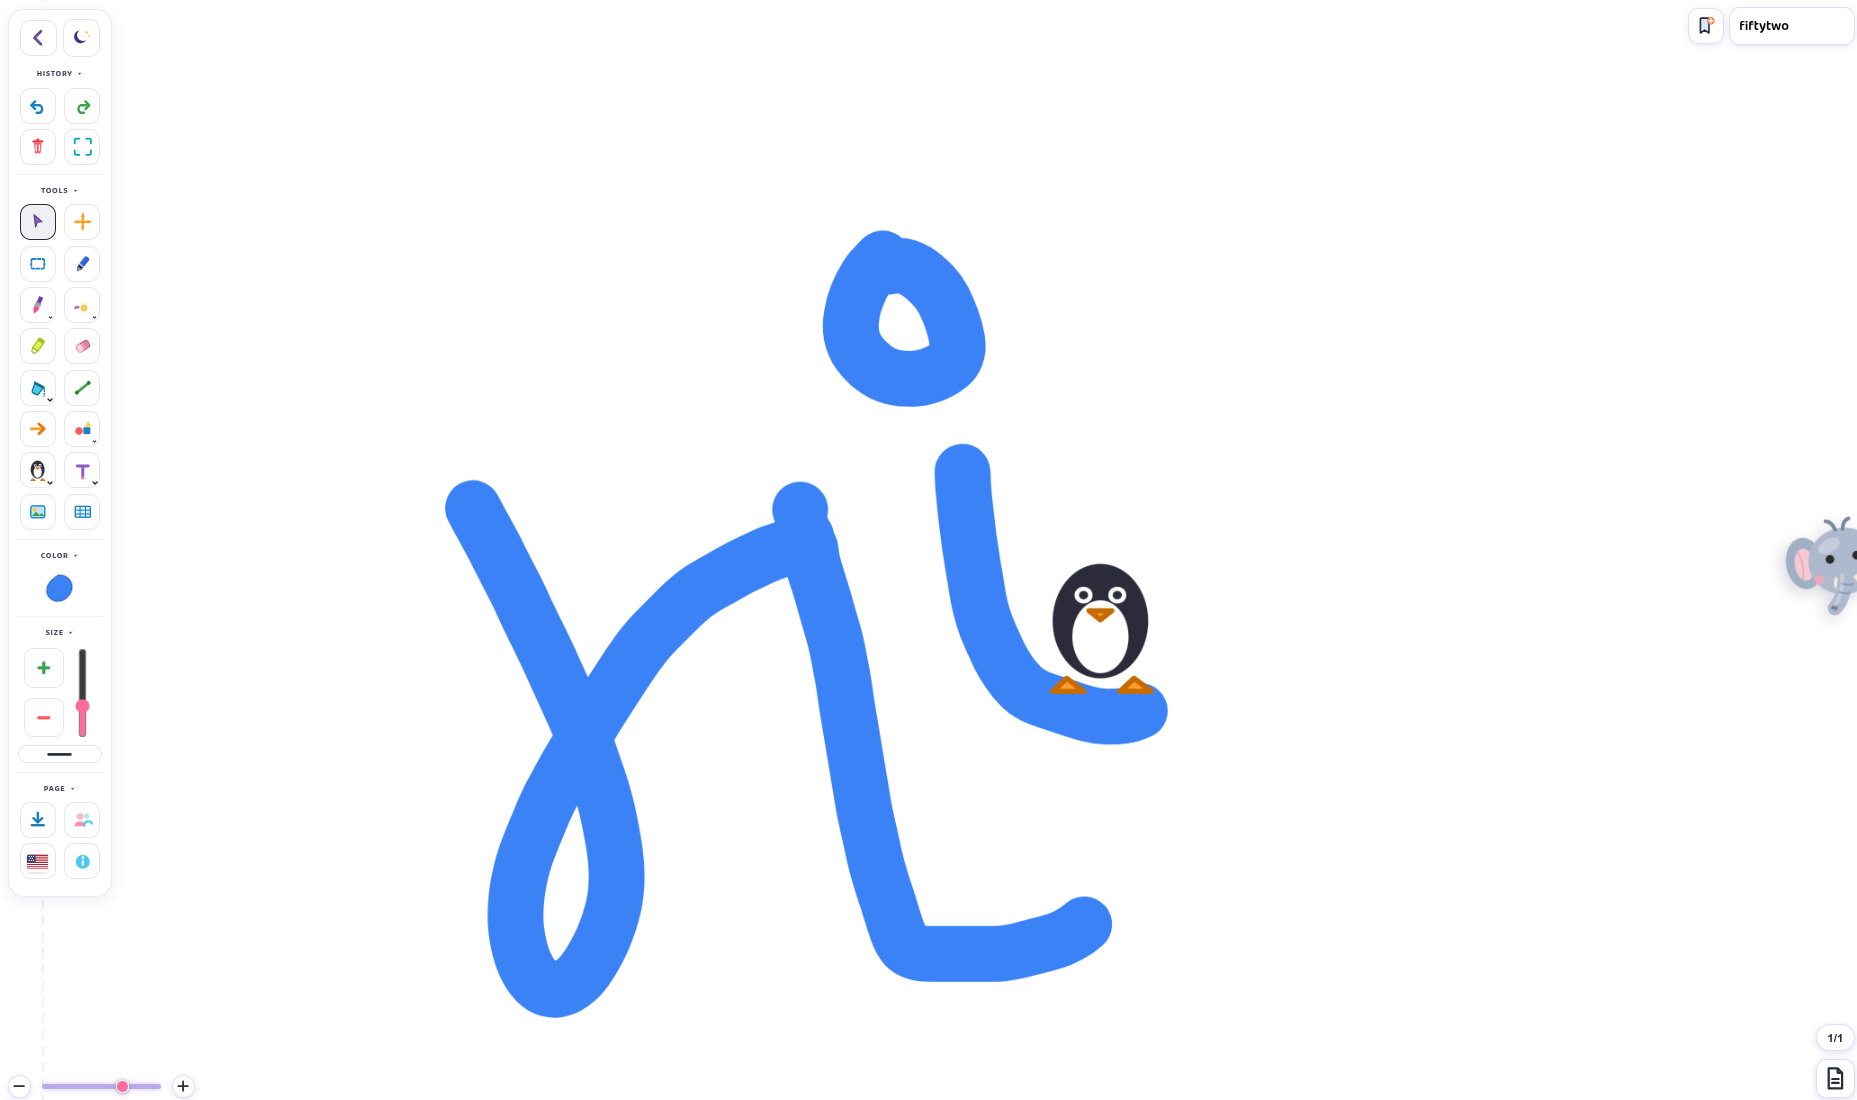
1. The canvas
This is your main drawing area. The canvas is huge, you can zoom in/out for larger space and draw freely. But if you want to print or save after drawing, draw inside the dashed rectangular light color box. That dashed line shows the A4 paper size, and the contents inside that will be printed. You can draw outside of that area though.
2. The top left pairPaint logo
The top left logo is not just a logo, that is an expand/collapse toolbar button too: Clicking on that expands and collapses the toolbar to make the canvas immersive and clean. If you long press the pairPaint logo, that switches between the vertical toolbar and the horizontal toolbar.
3. The expanded toolbar
This shows all the available tools in the app. On the top left there is the collapse (<) button to hide the toolbar and the light/dark mode switcher for your eye's protection.
History tools
Undo (if you make a mistake, you can go back), Redo (revert undo), the bin icon 'Clear everything' tool that clears everything in the canvas at once, and the full screen button to hide the browser title bar and go full screen experience.
The main toolbox
This is the main toolbox. This contains Select (to select and make changes on the objects), the pan tool (to move the canvas around), the area select tool to select multiple drawing objects at once, and the pen tool which is enabled by default.
Then the brush tool. You can find various brush options like hair, grass, heart, star line, sparkle line, dotted brush, airbrush, 1, 2, 3/a, b, c dotted traceable lines. You can find more info about these tools here: guide to all 24 brushes.
Also the moving animated icon is live paint, specially created for teachers, to draw animated lines to show flow and capture the attention: comet, flowing dashes, rainbow, spark and laser which gets removed itself. You can pause the animation in the same menu. More on animated strokes here.
Then there is the highlighter to highlight things. The eraser to erase manually and precisely. The bucket fill tool to fill color inside a closed area. You can find pattern fill in there to fill a specific pattern if you want. More on bucket fill here.
Then a line tool to draw straight lines, the arrow tool to draw arrows, the shapes tool to draw various shapes. The shapes tool contains some basic mathematics tools like: ruler, compass, protractor, divider, and set squares etc. for math classes. You can click, it'll be inserted automatically and you can move it around. More on the geometry box here.
Stickers, text, pictures, and tables
The stickers tool contains a predesigned stickers collection you can insert. You can insert stickers, planets, various shapes and objects, emojis too. You can find coloring objects and pages in the colouring section inside the sticker tool for kids to color the b/w images. In the same menu you can find the class section where the science and other subjects related images like lifecycles, skeletons etc. are, for classroom use. More on the sticker library here.
The text tool: to insert texts in your canvas, with 5 font options + background option. You can adjust size from the size slider just below the color tool.
Image tool: if you want to insert images from your mobile/computer in the canvas, you can use this option. It supports inserting from device, free worksheets from freekidworksheets.com (pairPaint's sister site). You can also add a YouTube video and website or embedding, where you can draw too. To use YouTube controls you have to click on the YouTube controls icon, and click again to draw over the video. When you draw while a video is playing, the video will be paused. To keep it playing, click on the lock icon. Click again to go back to auto pause mode.
Table tool: the app has a table tool in case you want to insert a table in your canvas. You can adjust its size and number of rows/columns.
The color tool
This is the color selection tool, from where you can select/change the color of your selected tool like pen, brush, shapes, lines, arrows, tables, texts etc.
The size tool
This is to control the size of objects in your canvas, which works with brush, pen, shapes outline thickness, table border thickness etc.
The line style tool
Then the line style tool (below the size slider): this tool looks unnoticeable but useful. That lets you draw various types of strokes like dotted stroke, dashed and solid line options.
The page section
This section is like other advanced settings/modes. This has 4 options: the save icon, if you want to save/export your work in PNG or PDF. More on exports here.
Then the language switcher icon with 4 languages: English, Portuguese, Spanish and Chinese. Default is English.
Then there is the collaboration icon (two person heads), to enter collab mode where you can create a room with a password if you want, and share the code to your friends or students to draw together. The collab mode has two options: Creator mode for teachers, where they can observe students' work, and the teacher or room creator can draw over other connected people or students, and then can see what students are drawing. The sync is not so seamless but functional and just works. Every student has their own canvas/drawing area. Another is Open mode, where everyone can draw in one canvas together. There is a 'Send my canvas to all' option too, which allows teachers to draw something, put various worksheets and classwork in their canvas, and send to all the students at once, and can observe using Creator mode. Fun right? You can download all the works in PDF later. More on rooms here.
Then the i icon: from this icon you can explore various blogs, tools info and other information about the app.
The zoom slider
There is a zoom slider in the bottom left to adjust the canvas zoom level. It gets hidden if the toolbar is collapsed though. You can zoom with your fingers and mouse anyway.
Top right tools
The top right section contains two options: Bookmarks and the name box. The bookmark is the place where you can save links of YouTube videos, images, embeddings locally. You can use them directly if you are using it as a whiteboard. You don't have to search for images, videos or other embeddings. This lets you prepare your resources earlier, instead of searching during the class. Just click on that, the app inserts it in the canvas itself. The name box is used for collab mode to know you. You can use any name in there, that is stored in your browser.
The elephant
That popping elephant peeking from the edge of the screen is our friendly mascot. He comes after a certain period of time. If he is bothering you, long pressing him will hide him for 10 minutes. Still bothering? Just go to Page settings at the bottom right corner and turn off the Twin switch. Forever gone.
The bottom right page setting
This tool is used to adjust your page settings, with various options like: portrait/landscape A4 pages, Add page button to add multiple pages for longer writings and note making that you can download later. Delete page button to delete the currently working page. Color section to change the page color too. You can use pattern filled page colors too, like plain solid color, horizontal (ruled) lines, the graph grid fill, dots fill grid and numbered graph fill for special maths classes. The number like 1/1 shows the current page/total number of pages above the page setting tool. The Twin switch lives here too.
Limitation
Not gonna lie, this app supports too many undos and object insertions and contains too many features, which becomes one of its weak points. Using too many videos, objects, brushes, text, shapes objects can slow down the speed of your canvas. That depends on your device, till the app is optimized enough to work smoothly in normal usage, classroom use. This is just extreme case only.
Ok, this was the quick guide for you. Thank you for using pairPaint. You can request/suggest new features and improvements from the contact/feedback section. Thank you again and good luck to you. VAMOSSSS!
Frequently asked questions
Do I need an account to use pairPaint?
No. Open the canvas and draw. No login, no download, no install. Your work autosaves in your browser.
What should I try first?
The Pen is already on, so just draw. Then try a brush, a sticker, and a shape. If you teach, try a classroom room next.
Will everything on my screen print?
No, only what sits inside the light dashed A4 box. Move your finished work inside the box before you print or export.
How do I hide Twin for good?
Open Page settings at the bottom right and switch Twin off. Long-pressing him only hides him for 10 minutes.
See it for yourself
Open pairPaint in your browser and start drawing in the next 30 seconds, no account, no download, nothing to install.